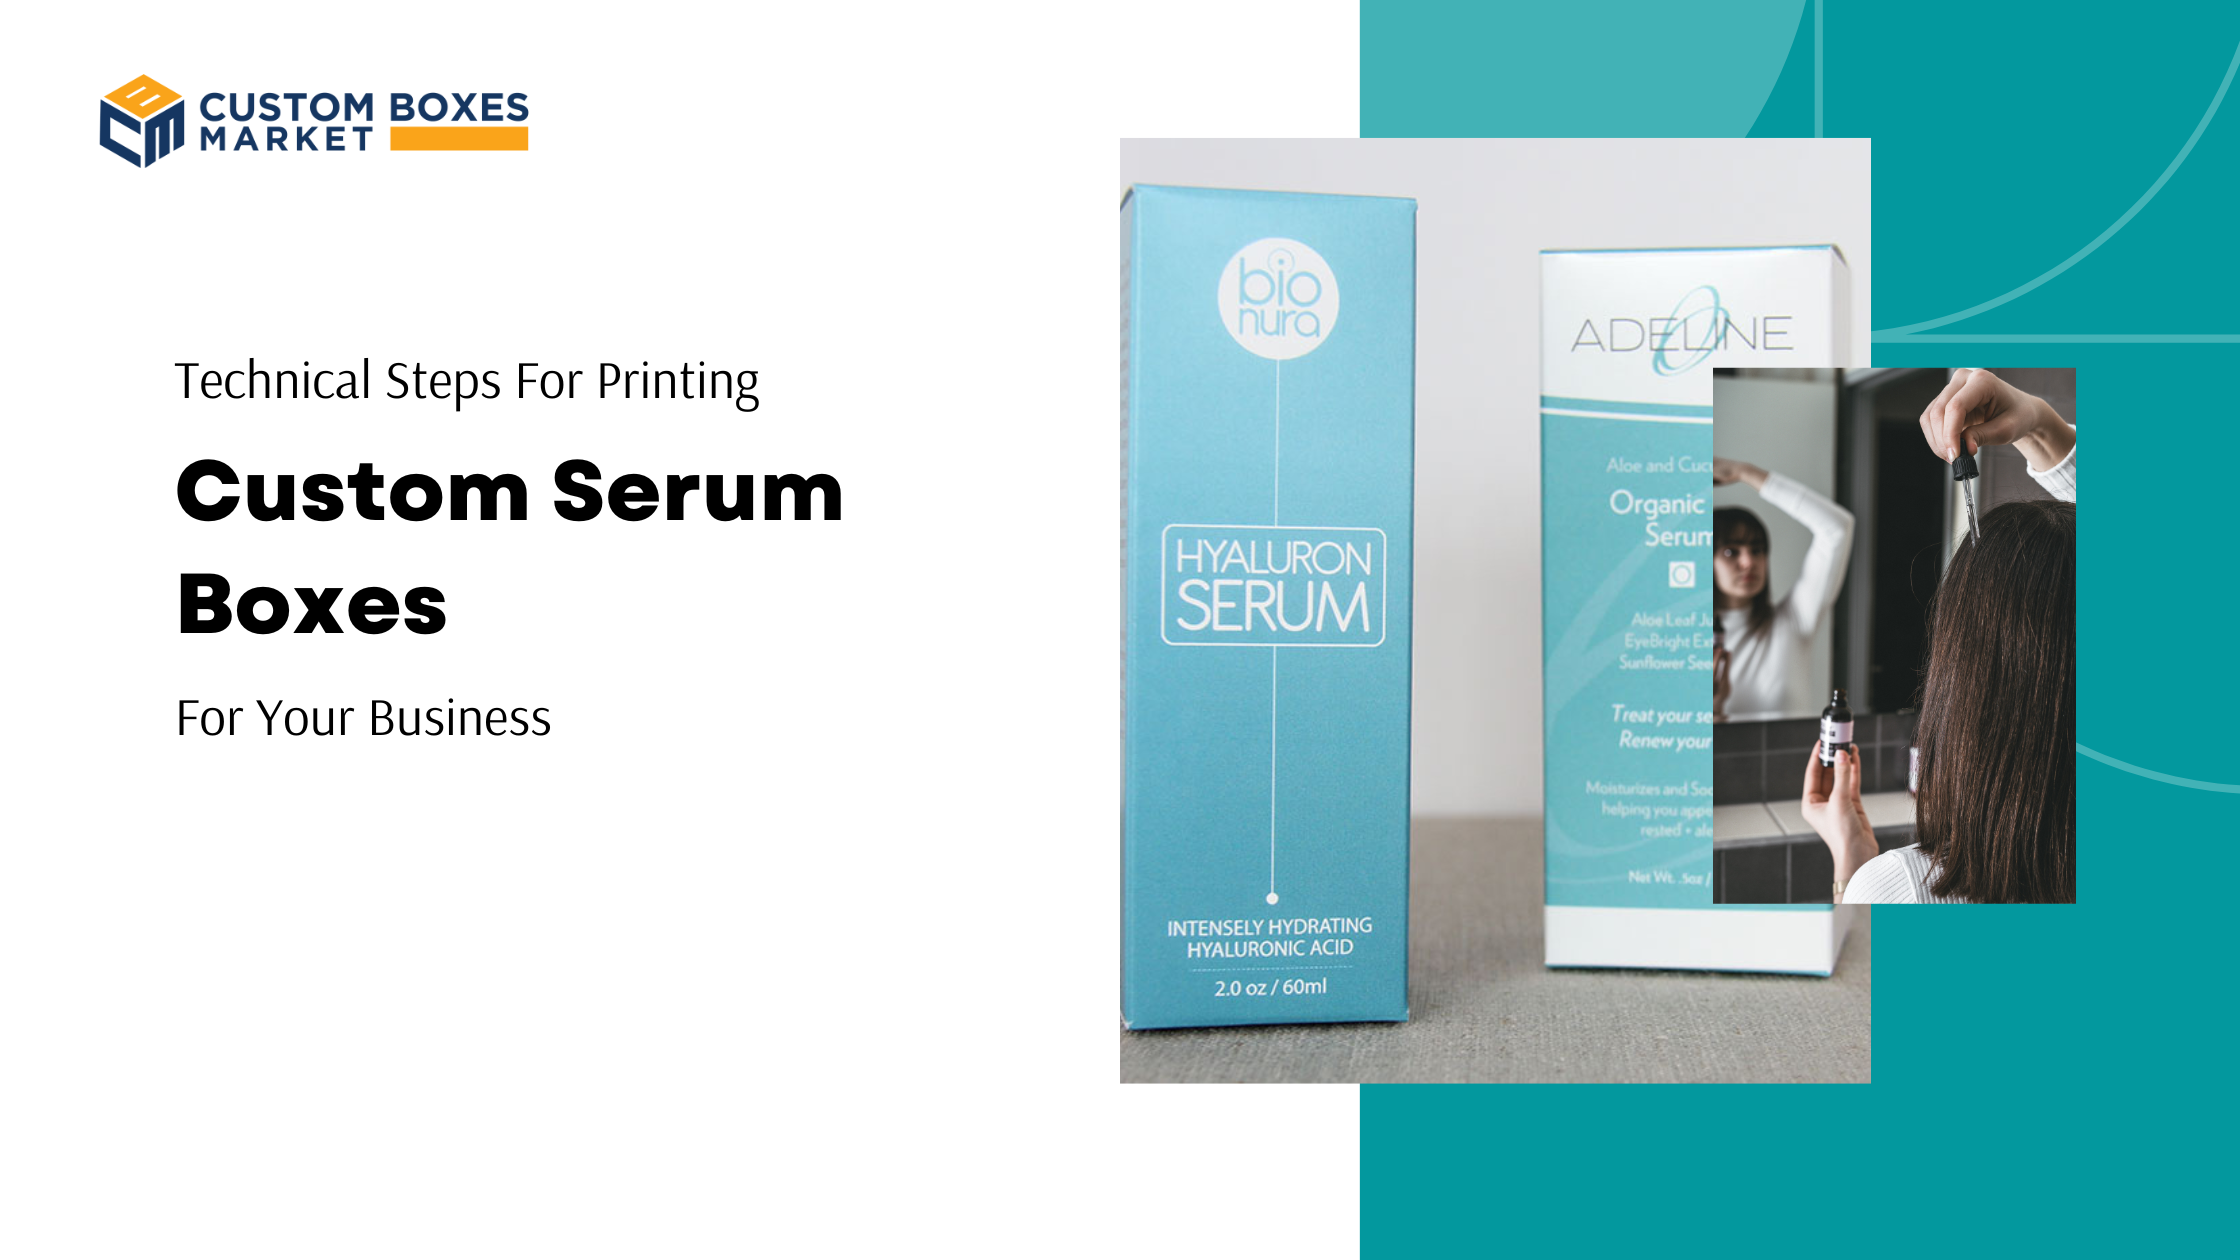
The serum packaging you choose to put your product in will have an impact on the perception of your brand and whether or not someone will want to invest in your product. To create custom serum boxes, it’s important to consider how much money you’re willing to spend, what resources you have available, and how many units of the product you’ll need to produce before breaking even on the costs. Be sure to follow this step-by-step guide to create custom serum boxes that sell your brand and attract new customers!
Let’s do it!
Custom skin care packaging boxes are a great way to stand out from the crowd. From custom printed boxes and pre-printed labels, you can create stunning packaging that will wow your customers.
Step 1: Draw the design on paper
Draw the design on paper. It is always recommended to start with a pen and paper, as it’s easier to move things around that way. Once you have the design finalized, transfer your sketch to a CAD program. If you’re using SketchUp, use 3D Warehouse in order to download existing objects from other users for use in your project. It is a great way of saving time and also allows you to customize your product even more as well as giving your customers something new! Look through the 3D Warehouse and find an object that best matches what you want your serum packaging boxes design to look like.
Step 2: Design your artwork in Illustrator
Once you have a design in mind, the next step is to create your artwork. You will want to use Adobe Illustrator and begin by creating a new document with a width of 8.5 inches, height of 11 inches and resolution at 300 dpi. Begin by drawing your background in black and then creating an oval shape on the left side. It will be where your serum packaging boxes are placed with the serum box wrapped around it. Add another oval on the right side with an open area for an imprint or sticker if desired and then add some text over it if you like.
Step 3: Print it onto sticker paper
Print out your design on sticker paper and cut out the shape of your box. This can be done with an X-Acto knife or a razor blade. Once you have your sticker, place it onto the skin care packaging boxes and use a Sharpie marker to trace around the edges of the sticker so that you can transfer it easily onto the box. Next, cover up the parts of the cardboard that are not to be printed on (e.g., sides) with masking tape. Use your X-Acto knife/razor blade again to carefully cut out each individual part of the sticker from its frame (e.g., corners). Carefully remove all parts from their frames and lay them flat in order for them to dry. Finally, peel off the stickers one by one and adhere them onto their corresponding shapes on your cardboard!
Step 4: Cut it out with an X-ACTO knife
Once your custom serum boxes design is complete, use a ruler and an X-ACTO knife to cut out the design. Take care when cutting so you don’t make any mistakes or ruin the edges of your logo. You can also use a pair of scissors if you don’t have access to an X-ACTO knife.
Step 5: Assemble
Once everything is cut out, it’s time to assemble! Place one box face down on top of the other, with the side that has two boxes overlapping facing up. Make sure that the two boxes are at least 1/2 apart from each other on all sides so there’s enough room for glue on both sides of the overlapping edge. Apply glue to this overlapping edge and let it dry for about 30 seconds before pressing them together. Next, apply a line of glue along each side where they will meet (on top). If you want to avoid having one box be slightly heavier than another after adding in filler material like tissue paper or cotton balls, then add in filler material now by packing tightly with either tissue paper or cotton balls before gluing those seams closed too.
Step 6: Apply them to the bottles
Once you have chosen your bottle, the next step is deciding on a label. There are different options that are available, depending on what you are looking for. For the skin care packaging boxes, there are labels that can be applied directly onto the bottle or ones that come in sheets. The sheeted labels can be cut with scissors and placed around the neck of the bottle. They will stay put because they stick to themselves. You may want to choose these if you are having trouble affixing them to your bottle. They also work well with most clear bottles because they don’t detract from their appearance like some other kinds of labels might do.
Step 7: Package your product
Packaging is an important part of creating a product. If you want your product to stand out on store shelves, it’s important that the packaging be just as beautiful as the product itself. Investing in some custom serum packaging will make sure that your product is not only protected during shipping but also looks great when it arrives at its destination. The more unique and personalized the package, the more customers will be attracted to your products. When you’re selecting custom serum packaging, think about what would best represent your company and what would catch people’s attention. You can choose from a variety of different materials such as cardboard or plastic for your containers or even purchase box inserts with customized inserts and designs to showcase different types of serums so that customers know exactly what they’re getting before they purchase them!
Conclusion
Custom serum boxes are a great way to set your products apart and make a lasting impression on customers. It’s also an excellent marketing tool that can help you build your brand while increasing sales. The key is to create something that speaks to your customers, so think about the demographics you’re targeting and what they want from a company before you start brainstorming ideas. Once you have an idea in mind, it’s time to take the next step and turn custom serum packaging design into reality.